XMatrix Online: arrange multi-axis moves on the PC, without writing a program
XMatrix is the software system of XMSP. This page is the online function, code XR-Online. On the PC you map devices, commission motors, and build cues and sequences. A change can be run immediately. You do not write a separate motion-control program.
- The PC schedules in real timeA change runs immediately
- Cue → sequenceNo-code flow
- Multi-axis networkOne place to map and commission
- DI / UDPExternal trigger
What it does

XMatrix Online is a general no-code multi-axis control system. Several motors can be networked, homed, positioned, and run together in one project. You set each axis position with the mouse, put those moves in an order, connect the devices, and run.
It addresses the usual multi-axis project, where the control program is written from scratch, axis addresses get mixed up, homing and collision checks are tuned over and over, and every move change waits on a programmer. Mechanical, electrical, and integration staff can build the moves and edit them while watching the machine.
- Manage groups, axes, and motion modules in one project. Several devices daisy-chain over Ethernet.
- Matrix mapping ties each cell on screen to the axis address on site.
- A cue stores position, speed, and dwell for a group of axes.
- A sequence lines cues up into a flow, with a count, a loop, and homing before the run.
- Run by hand, from a DI, or from UDP. A move after startup can be configured as well.
XMatrix Online fits projects whose move logic is involved, changes often, or has to stay in step with business software on the PC, and where an industrial PC or a desktop computer is on site. Examples include positioning, multi-axis arrays, fixtures, lab prototypes, and special-purpose machines.
How to do it
- Install the network driver XMatrix needs. Connect the PC to the first MSP device with a wired network, and daisy-chain the rest.
- Create the hardware configuration, add axes and motion modules to match the site, and save the project.
- Finish matrix mapping so each cell address matches a motion-module number on site.
- Check limits, direction, homing, maximum travel, and multi-axis collision parameters, one axis at a time.
- Create cues, then add them to a sequence. After the devices connect, run once or run in a loop.
First example: several axes reach a target, then return
A four-axis move, not tied to one industry, shows the basic XMatrix Online logic. Finish the mechanical safety check, then create two cues:
| Item | Axis 0 | Axis 1 | Axis 2 | Axis 3 | Purpose |
|---|---|---|---|---|---|
| Cue C0: start | 0% | 0% | 0% | 0% | Every axis returns to the work start |
| Cue C1: target | 20% | 40% | 60% | 80% | The four axes reach different targets |
- In Hardware configuration, create 4 axes. In Matrix mapping, map 4 cells to motion modules 0–3 in order.
- Open Commissioning and, axis by axis, confirm
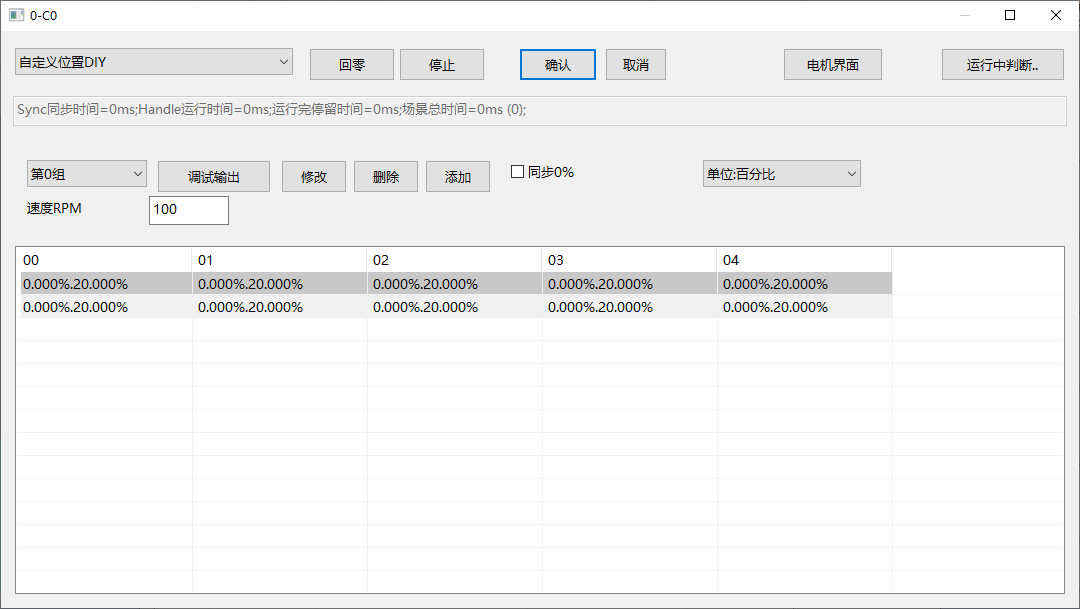
LIM−,LIM+, motion direction, andHMhoming, then set maximum travel. - Create cues C0 and C1 and fill each axis with the percentages in the table. Start with a low speed, and leave a sensible dwell on the cue.
- Create sequence S0 and add C0, C1, C0 in that order. Set the run count to 1 first.
- Return to the main screen, connect the devices, and run once. After direction, travel, and spacing are safe, try a loop or adjust position and speed.
Full procedure
The sections below follow real use: install, map, commission, cues, sequences, run, and external triggers. Button positions can move between interface versions. The relationship of the steps does not.
Prepare, wire, and start
- On a Windows PC, install the WinPcap network driver from the release package first. One PC usually needs this only once.
- Use a wired network. The PC connects to the first device. Further devices daisy-chain as
NET2 → next unit NET1, and station addresses must not repeat. - Start XMatrix. The online link uses raw frames on the network adapter. You do not enter a device IP. If connection fails, check WinPcap, the cable, and whether another program owns the adapter.
- If the software starts with no window, or exits at once, confirm that the system drive has
C:\XKinetic, then start it again.
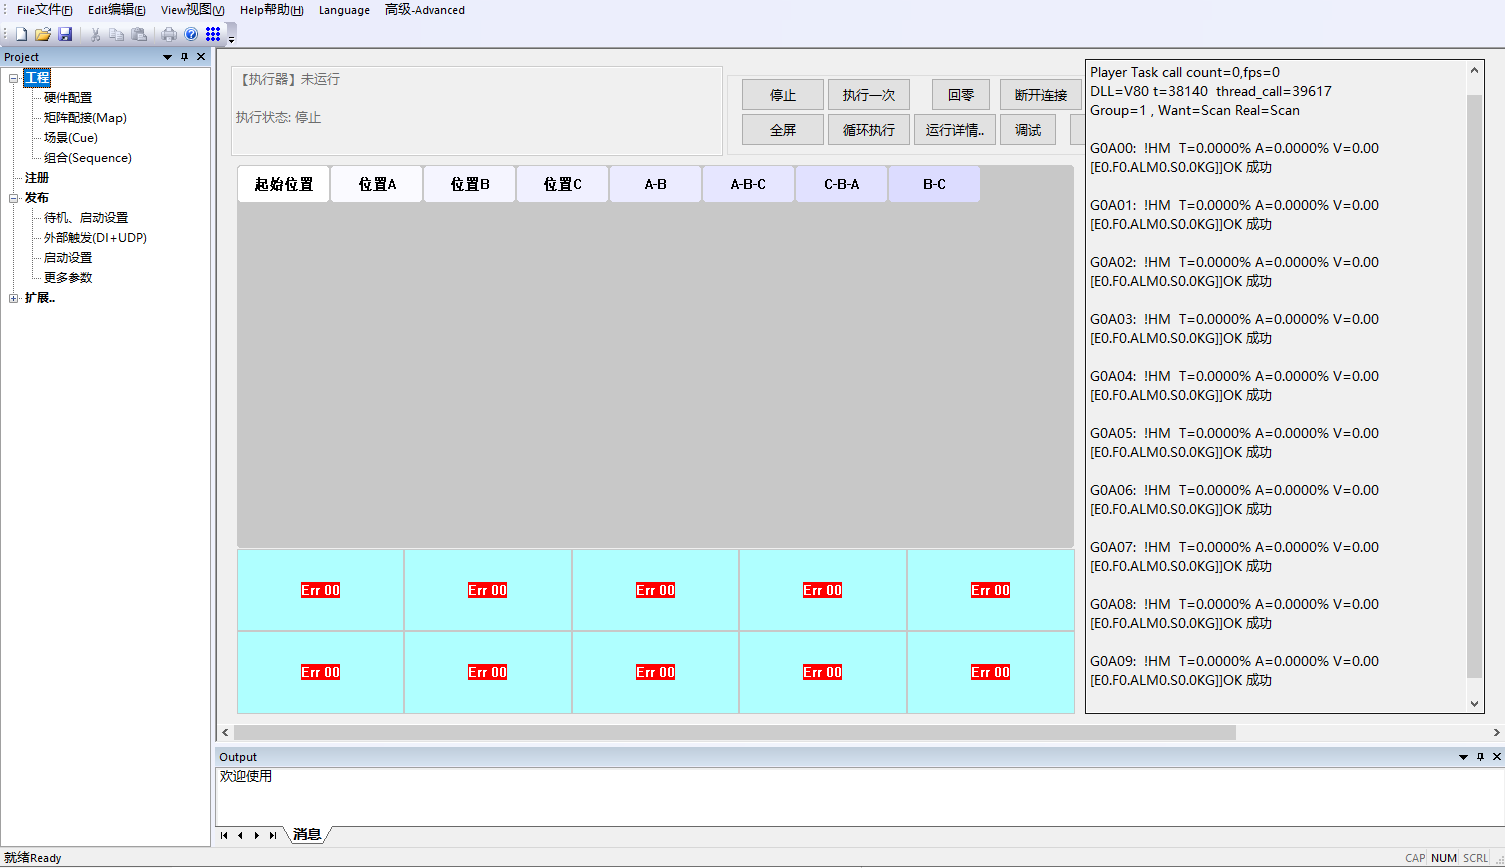
Create the project, then the shared configuration and mapping
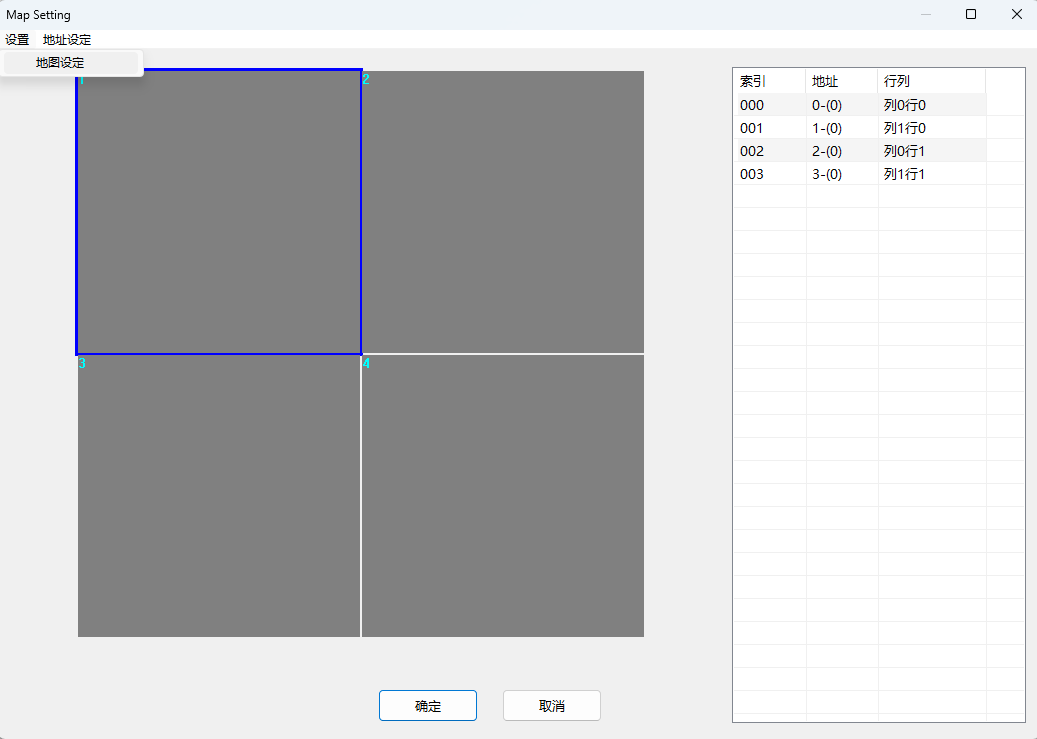
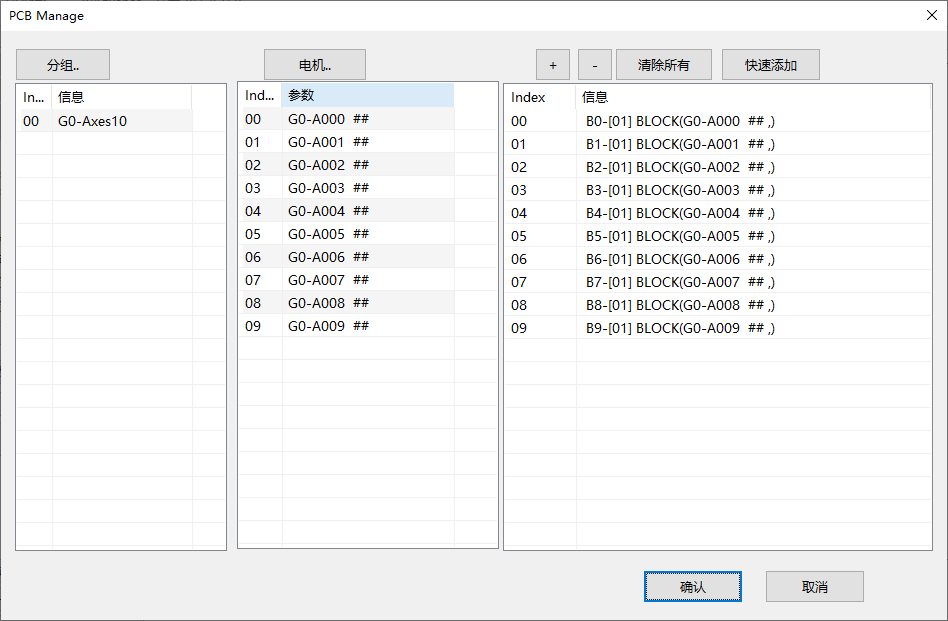
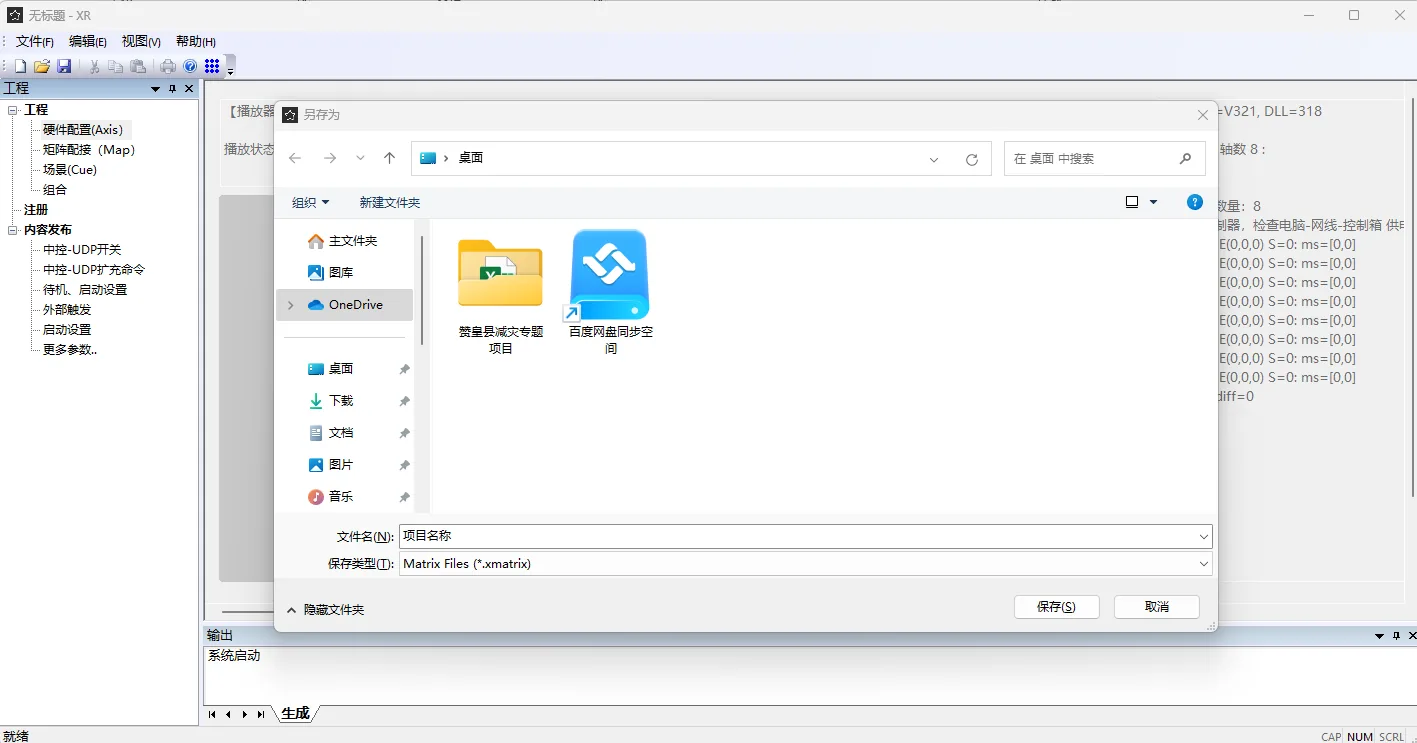
- Hardware configuration: Create groups, axes, and motion modules to match the site. After a hardware change the software reconnects. Save the project when that finishes.
- Matrix mapping: Set rows and columns, and line cell addresses up with motion-module numbers. Module numbers start at 0. Cells usually display from 1. Do not shift one against the other.
- Save the project: The project file extension is
.xmatrix. It holds hardware, mapping, cues, and sequences, and it should be backed up with the project.
Commission the motor: signals first, then motion
The shared commissioning screen shows connection, run state, home, positive and negative limits, inputs and outputs, current position, and alarms. On the first pass, watch the signals, then jog slowly and home.
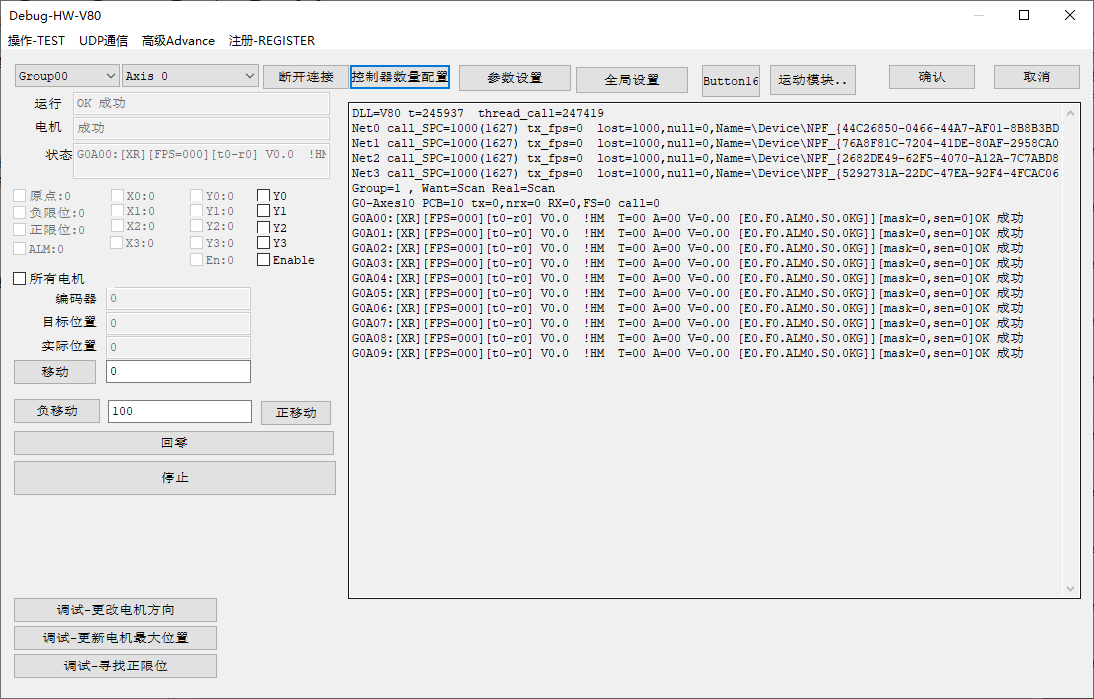
- Watch the home and limit signals and confirm they follow the sensor.
- Jog slowly and confirm that software negative really moves toward the mechanical negative. If it is reversed, change the motor direction first.
- Home the axis. Confirm that after it finds home it leaves the sensor by the configured offset.
- Set maximum travel so the working position stays inside the positive limit. Positive and negative limits are for faults. They are not everyday stop points.
- If axes can collide, also set homing order, wait before and after homing, and start delay in the positive and negative directions.
Cues, sequences, and running
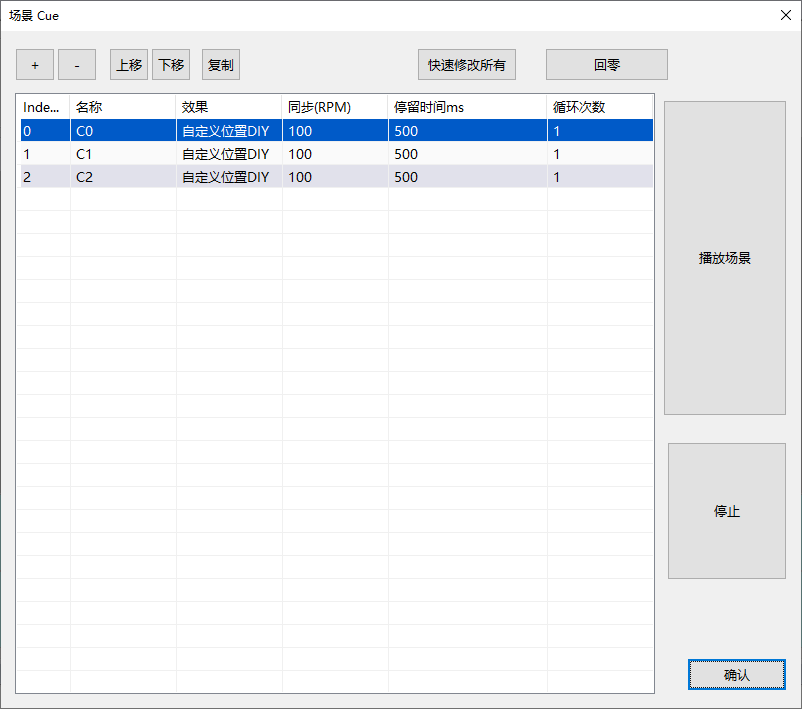
- Cue: Stores position, speed, and dwell for a group of axes. Enter pulses or a percentage, or read the current motor position.
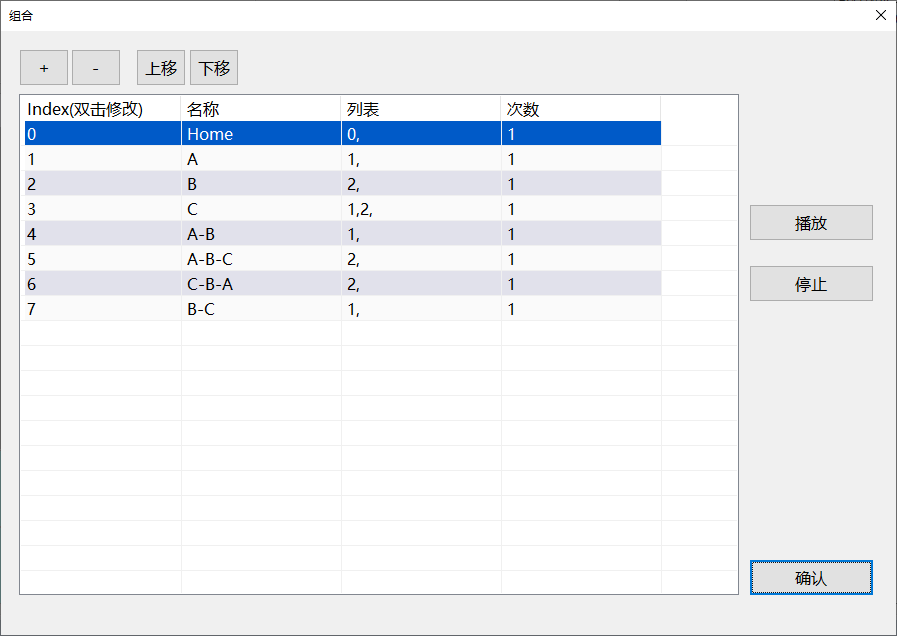
- Sequence: Adds cues to a list in order, sets the run count, and sets whether homing is forced before the run.
- Run: After the main screen connects, run once to verify. A loop should wait until direction, travel, limits, and spacing between axes are all confirmed.
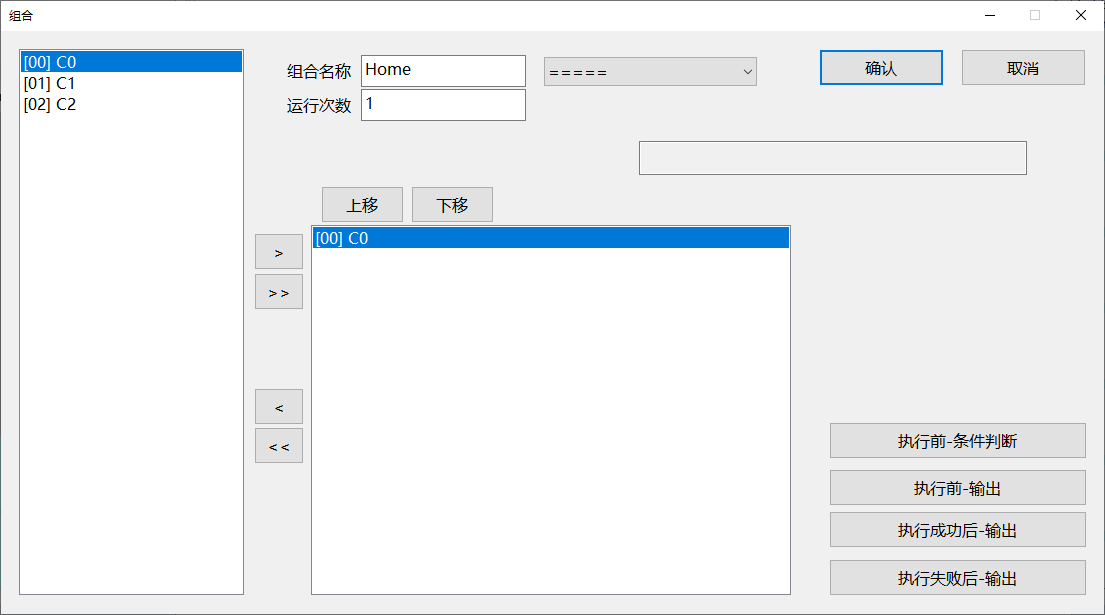
Triggers
An online move can be started from the main screen or from a signal on site. A trigger can be bound to home, stop, run every sequence, or run one sequence. Sequence numbers start at S0 .
| Type | How to use it | Check first |
|---|---|---|
| Input (DI) | Choose the device and X0–X3, then a level, a rising edge, or a falling edge | Whether the input, the edge, and the trigger item are enabled |
| UDP value | Bind a numeric trigger such as P0–P99 to one action | Turn on UDP receive on the commissioning page. The usual port is 6000 |
| UDP custom command | After an agreed string arrives, run a chosen sequence, or home, or stop | Whether the string matches exactly, and whether sequence numbers start at 0 |
When several triggers are active, software priority applies. A larger number wins. A DMX512 trigger is a different control path. Wiring and channels are in XMatrix DMX512 Interface.
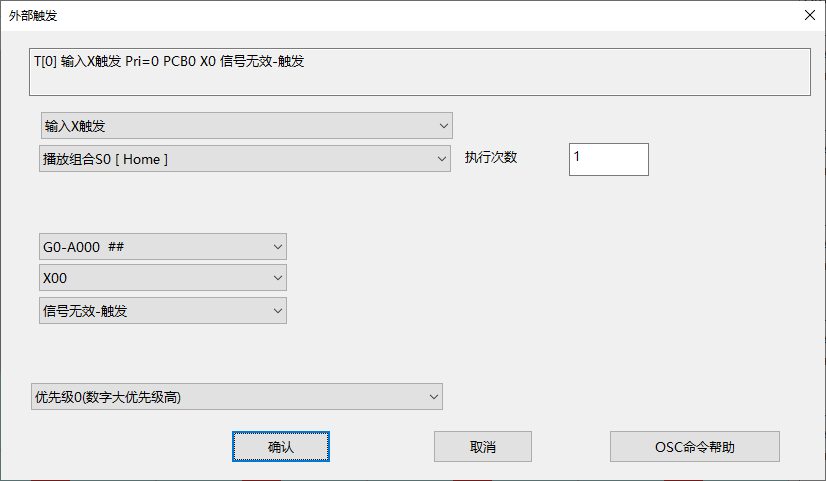
Key parameters and collision avoidance
Parameter names follow the current software screen. Items marked as needing a restart should be powered off and on after a change. Prove the move at a conservative speed, then adjust for load and cycle time. The full parameter notes are in XMatrix Technical Documents.
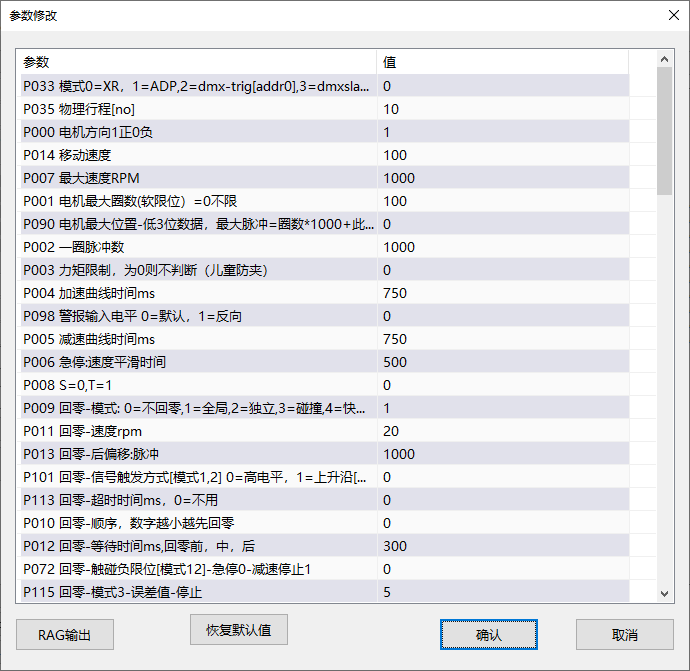
| Parameter | Guidance / default | Description |
|---|---|---|
| Homing speed | Keep it slow. Notes often show 100–300 rpm | Do not overshoot home, and do not shock the mechanism. Recheck it for each motor and mechanism. |
| Move speed | Notes often show 200–500 rpm | Cue and sequence speed is still limited by the motor maximum speed |
| Accel / decel time | 100–10000 ms, default about 500 ms | A larger value starts more gently. Increase it if the mechanism shakes. |
| Maximum travel | Inside the positive limit | This is the full-scale reference for percentage positions. Do not ride the positive limit in normal running. |
| Torque limit | 0 means not evaluated | Set it when the axis needs anti-pinch or stop-on-obstruction protection |
| Homing order (module) | A smaller number homes first | Open-close versus rotate, or several carriages on one rail homed in batches. This is central to collision avoidance. |
| Wait before / after homing | Set from the site | Stagger the starts, together with the delay before positive and negative moves |
| Delay after startup | Default 1000 ms, range 0–100000 ms | Leave time for the device to connect, for signals to settle, and for homing |
| Module safety limit % | Set as required | Position / deviation / center / RPM thresholds. Crossing a limit stops the axis. |
Save the project and run on site
- Project backup: Save the
.xmatrixfile. When you change PCs, reinstall the network driver and import the project. Do not rely on the only copy sitting on the site PC. - Startup settings: You can open XMatrix after Windows starts, open a named project, and home or run a sequence after a delay. Verify once by hand before production running.
- Automatic action: Choose no action, run every sequence, loop every sequence, run one sequence, or loop one sequence.
- Optional content: The software also has an idle screen and motion-synced media. Those are project-specific. They do not change the basic multi-axis flow.
Matching hardware
No-code covers how the move is arranged. For the axis to move safely, the site still needs the items below.
| What you need to do | What to fit | Where it connects |
|---|---|---|
| Home / find the origin | Slotted optical sensor ×1 | Controller HM |
| Positive and negative limit protection | Slotted optical sensors ×2 (or software limits only) | Controller LIM+, LIM− |
| Hold a vertical axis when power is removed | Brake motor + 24 V relay + brake cable | Controller DO through a relay |
| Multi-axis coordination | Ethernet cable (daisy chain) | Controller Ethernet port |
The full map is in XMatrix Features × MSP Hardware. Accessory categories are in Accessories and matching parts.
Common questions
| Symptom | Look here first |
|---|---|
| Connection fails | WinPcap, the cable, and adapter ownership. This is not an IP / ping problem. |
| Connected, but it will not move | Homing, limit state, direction, and whether maximum travel is 0 |
| The whole layout jumps to the wrong place | Does the matrix address match the module number? Is the cue in the wrong cell? |
| Axes on one rail collide | Homing order, positive and negative delays, cue start delay |
| An external trigger does nothing | Is the trigger enabled? Priority? DI edge? Is UDP receive open? Does the command match? Do sequence numbers start at 0? |
| After the PC is shut down, the device no longer runs | That is the normal boundary of the online version. To remove the PC, use XMatrix Offline and transfer the project to the device. |
| It does not home again after a run | Is “home first” on the sequence enabled, is homing forced before the run, or is homing forced after N runs? |
| The first launch shows no window | Check that WinPcap and the release package are complete, and that the system drive contains
C:\XKinetic |