XMatrix Offline: arrange the move, transfer it, and let the device run without the PC
XMatrix is the software system of XMSP. This page is the offline function, code XR-Offline. On the PC you configure, commission, and build cues and sequences, then transfer them. After that check passes, the PC can leave. The device runs from a power-up action, an input, or a UDP trigger.
- Runs on its own after transferDoes not keep a PC on site
- The PC can leavePower and a trigger stay on site
- Power-up / DI / UDPThree ways to start
- Cue → sequenceNo-code move flow
What it does
XMatrix Offline transfers a multi-axis move built on the PC onto the MSP device. After the transfer, and after the device is switched to offline mode, it can run the confirmed move on its own. A Windows PC does not have to stay on site.
It addresses the case where the move is already settled, and you do not want an industrial PC on every machine. The device can home and run a sequence at power-up, or a button, a dry contact, or a show-control UDP message can select a sequence already on the device.
- Finish hardware configuration, motion commissioning, and move editing on the PC.
- Transfer cues, sequences, the startup action, and the trigger map onto the device.
- Start from power-up, a digital input, or UDP.
- After the PC leaves, the device still runs what was transferred.
- To change a move, reconnect the PC, edit, and transfer again.
When to use XMatrix Offline
| On site | How to use it |
|---|---|
| A cyclic station or an unattended machine, and you do not want an industrial PC left there | After the move is confirmed, transfer it, remove the PC, and let the device run |
| A button or show control switches moves, and the flow is already fixed | Trigger a transferred sequence from an input or from UDP |
| Production machines, a sample that leaves the shop, or a fixed flow that repeats | Transfer the confirmed project onto each device. Leave power and the trigger on site. |
Offline fits projects whose move flow is already settled. After a move change, transfer again and verify one standalone run.
How to do it
- Create a project in XMatrix and finish hardware configuration and matrix mapping for the axis count on site.
- On each axis, check home, positive and negative limits, direction, homing, maximum travel, and collision parameters.
- Create cues and sequences. Run once while the PC is connected, and confirm the move and the timing.
- Set the power-up action and the input or UDP trigger, and transfer the whole configuration onto the device.
- Set
APP.0to 1, check the offline axis count, power-cycle, and verify. - After power-up and the external triggers both behave, remove the PC.
How it is connected
- While editing and transferring: The PC connects to the devices with Ethernet. Several devices daisy-chain port to port. Addresses must not repeat.
- While running standalone: Leave power, motors, home and limits, the daisy-chain cables between devices, and the trigger wiring the project needs.
- External trigger: A button or dry contact connects to a controller digital input. Stepper, servo, and MSP1001 follow the silkscreen of that controller. Show-control UDP is sent to the device communication port.
First example: a four-axis sequence that runs on its own at power-up
A four-axis out-and-back move shows how a verified move is transferred so the device can run it alone:
| Item | Axis 0 | Axis 1 | Axis 2 | Axis 3 | Purpose |
|---|---|---|---|---|---|
| Cue C0: start | 0% | 0% | 0% | 0% | Every axis returns to the work start |
| Cue C1: target | 20% | 40% | 60% | 80% | The four axes reach different targets |
| Sequence S0 | C0 → C1 → C0 | One complete out-and-back | |||
- Create 4 axes in the hardware configuration. Finish matrix mapping, limits, direction, homing, and maximum travel.
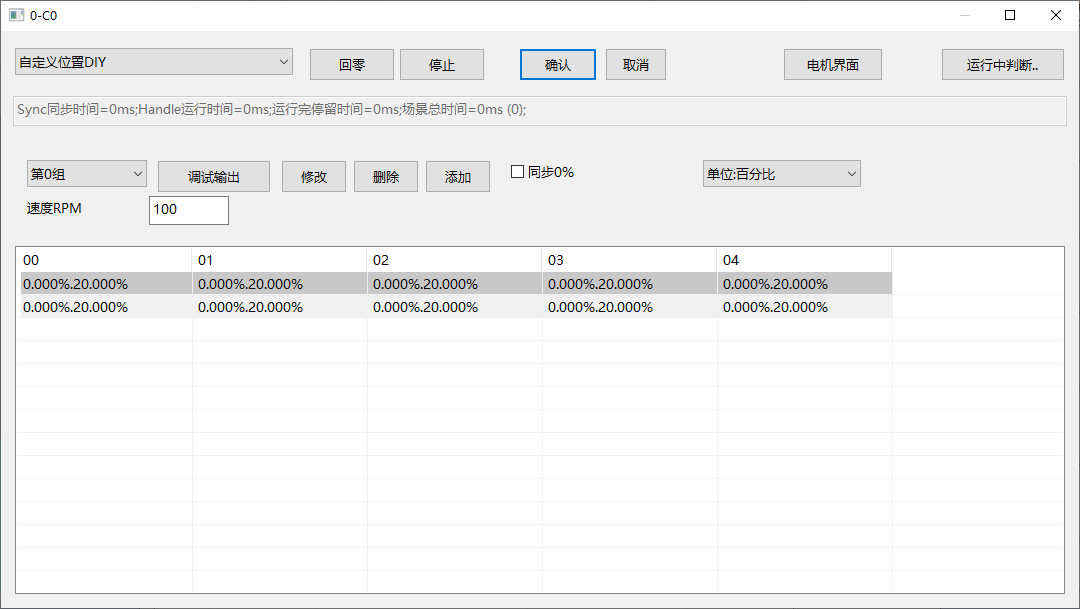
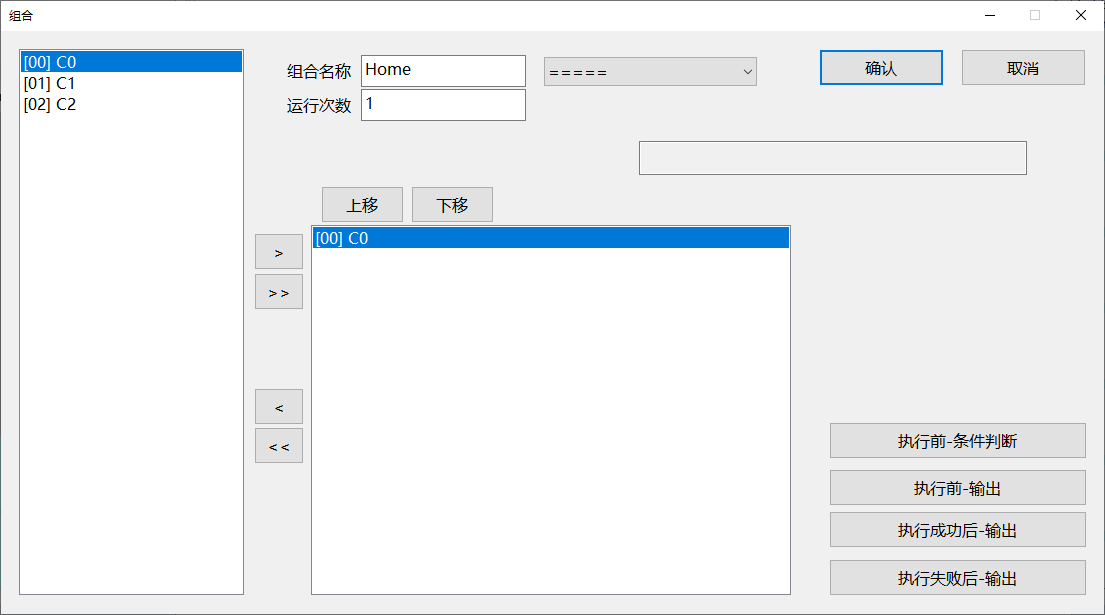
- Create cues C0 and C1, then sequence S0, and add C0, C1, C0 in that order. Run once while the PC is connected.
- In the sequence or startup settings, enable homing before the run and set the startup action to S0. If it must repeat, change it to a loop only after that check passes.
- Choose Transfer and write the cues, sequences, and trigger configuration onto the device. Do not remove power or the Ethernet cable during the transfer.
- Set
APP.0to 1, set the offline axis count to 4, save the parameters, and power-cycle. - Watch whether the device homes and then runs S0. Disconnect the PC, power-cycle, and repeat the test. The offline handover is complete only after that second test.
Full procedure
Below: shared configuration and commissioning, the power-up order, triggers, key parameters, and the handover check. Button positions can move between interface versions. The order does not: connect and commission, then transfer, then disconnect the PC and test again.
Shared configuration, commissioning, and parameters
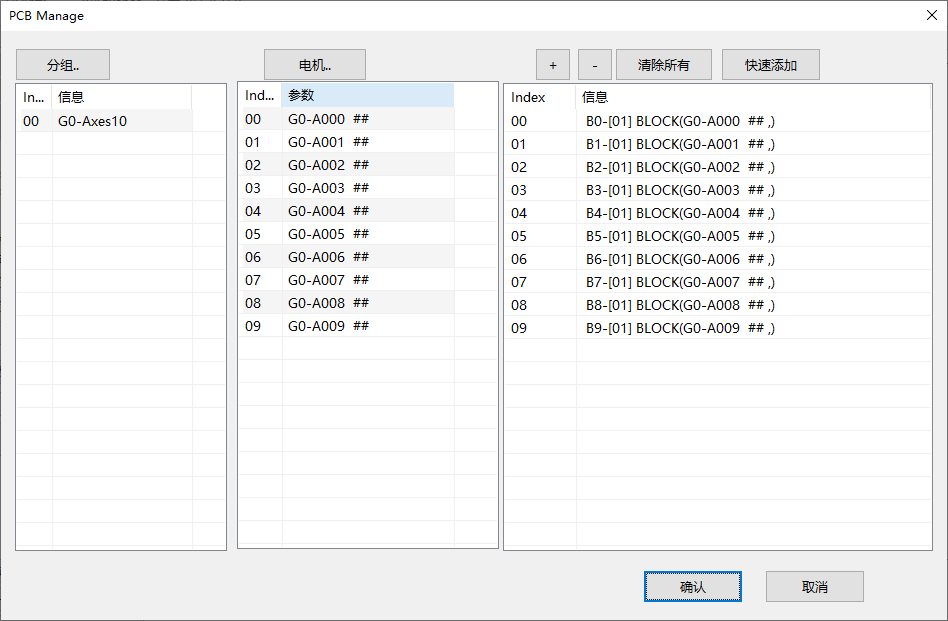
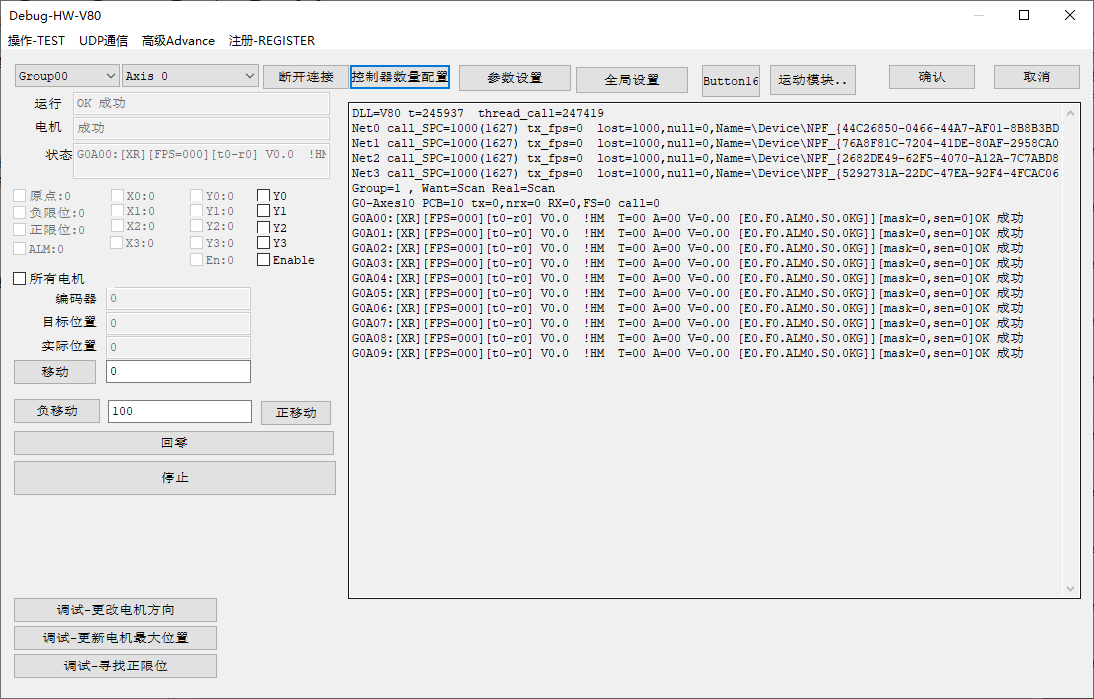
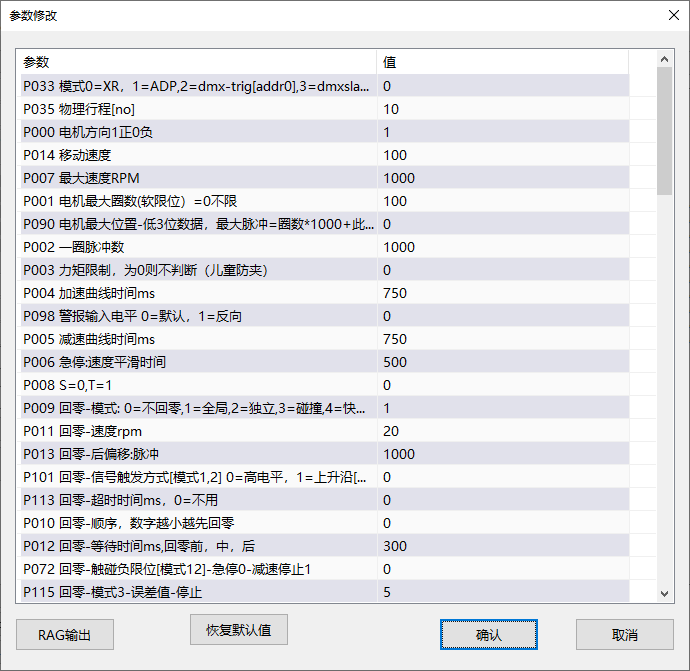
This software function shares the MSP device foundation with the other XMatrix entries. Configure groups, axes, and motion modules, check home, limits, direction, and homing, then set speed, acceleration, travel, and protection. Enter the software mode on this page only after that foundation is done.
What happens after power-up
When the device is in offline mode and the move has been transferred, it runs in this order:
- Wait for the startup delay (default 1000 ms; the firmware treats the shortest delay as 1000 ms).
- Run the startup action: often bound to
Home, or run a sequence directly. - An axis that has not been homed cannot run a cue. It homes first, or it reports that homing is required.
- The sequence runs its cues in order. The loop count follows that sequence.
- Meanwhile the inputs and UDP are watched. A new trigger can change the sequence or stop. Whether it can interrupt depends on the mutual-exclusion setting.
- If any device alarms or communication fails, the related move stops and the matching status is shown.
Triggers
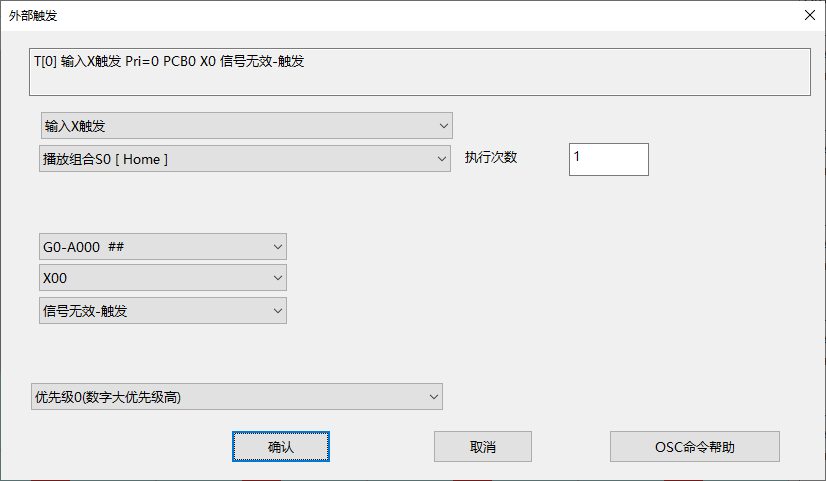
Trigger configuration is in the project tree under External trigger (DI+UDP), and it is transferred with the sequences. The older 16-channel map in the firmware parameters is no longer used.
Start / stop actions (the words in the list)
| Action name | What the controller does |
|---|---|
Null | Does nothing (a common reason the machine is still after the PC leaves) |
Stop OK / Stop Error | Stop normally / stop as an error |
Home | Stop first, then home the whole group |
S0-7 | Run every sequence in order from S0 |
S0-7 Loop | Loop every sequence |
S0 … S7 | Run one sequence |
The Other triggers window also has startup delay (default 1000 ms), delay after a stop action (firmware runs at least about 3 seconds), and the action after stop.
Switch a sequence from an input or from UDP
- Input: add an item in external triggers, choose type “input X trigger”, and bind one of the actions above. Choose rising or falling edge to match the wiring. If the contact chatters, adjust input filter time and count in the parameter table (default 10 ms / 2 counts).
- UDP sequence select: choose type “show-control UDP trigger” and bind that trigger path to a sequence (or Home / Stop). The show controller sends the matching command to the communication port on the device IP (default
9999). An unbound trigger path does nothing. The full mapping is supplied with the project documents.
Key parameters
Check the items below before the device runs alone. The full parameter table is in XMatrix Technical Documents.
| Name on the parameter page | What matters |
|---|---|
APP.0 0 = daisy-chain mode, 1 = offline mode | Must be 1 for standalone running. During commissioning it can be 0, then set back to 1 after the check. |
| Offline mode — axis count | Set it to the real axis count. After the devices connect it usually follows the current project. |
| Homing mode | 0 no homing; 1 global; 2 independent |
| Show-control UDP port | Default 9999; restart after a change |
Matching hardware
XMatrix Offline covers transferring the move and running without the PC. For the axis to move safely, the site still needs the items below.
| What you need to do | What to fit | Where it connects |
|---|---|---|
| Home / find the origin | Slotted optical sensor ×1 | Controller HM |
| Positive and negative limit protection | Slotted optical sensors ×2 (or software limits only) | Controller LIM+, LIM− |
| Trigger a move from a button | Button or dry contact | Stepper DI0–DI3; servo DI-00–DI-03; MSP1001 X0–X3 |
| Multi-axis coordination | Ethernet cable (daisy chain) | Controller Ethernet port |
The full map is in XMatrix Features × MSP Hardware. Accessory categories are in Accessories and matching parts.
Common questions
| Symptom | Check first |
|---|---|
| Nothing moves after the PC leaves | APP.0 Is it 1? Has the project been transferred? Is the startup action still Null? Is the offline axis count correct? |
| Power-up only homes, and does not run a sequence | Is the startup action bound only to Home? When it should run by itself, bind S0 or S0-7 |
| Reports that homing is required | A follower axis has not been homed. Start with Home, or do not leave homing mode at 0 |
| A UDP trigger was sent and nothing happened | Is that path still empty in external triggers? Are the target IP and port correct? Was the project transferred again after the change? |
| Some axes do not move | Offline axis count, Ethernet daisy chain, device address, and alarm state |
| The cue is empty | The cue was not updated to the controller, or the transfer was interrupted |